Features of inline inspection
従来のSKUと不良項目ごとにまとめた「不良報告データ」と異なり、製品1枚1枚全ての不良箇所と不良項目を登録することで、縫製ラインまたは作業員ごとの不良の傾向を把握し、迅速且つ適切なフィードバックを行うことによって不良発生を抑えることを可能とするのがインライン検品の特徴です。
Unlike the conventional SKU and the “defect report data” that summarizes each defect item, It is a feature of in-line inspection that it is possible to suppress the occurrence of defects by grasping defect trends per factory line or per worker and providing quick and appropriate feedback, by registering the defect location and defect item of all products one by one.
Select style number
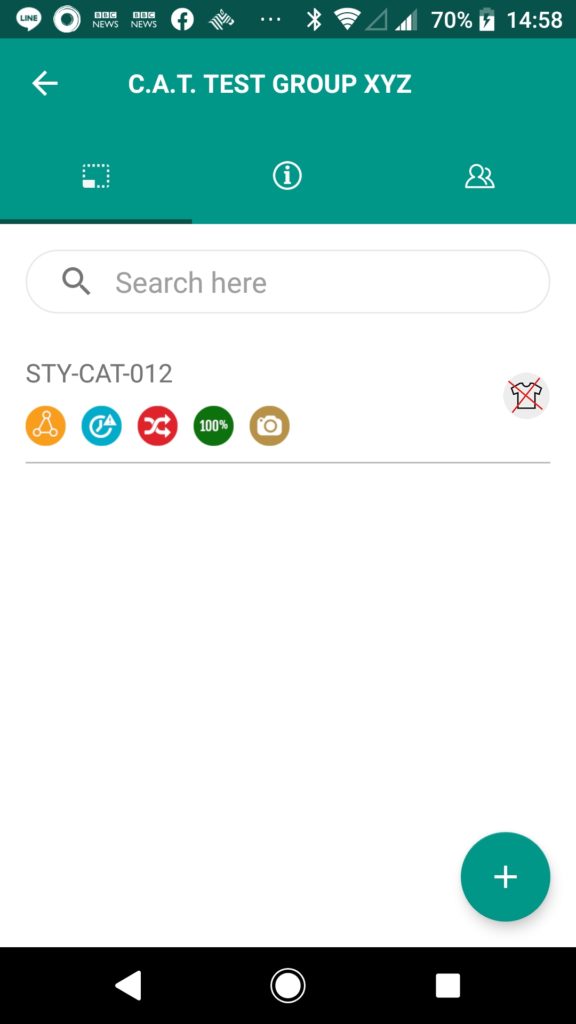
- Tap and select the applicable style number from the style number list on the group detail screen.※It is possible to edit or duplicate the style number by pressing and holding the product number (Super user only)
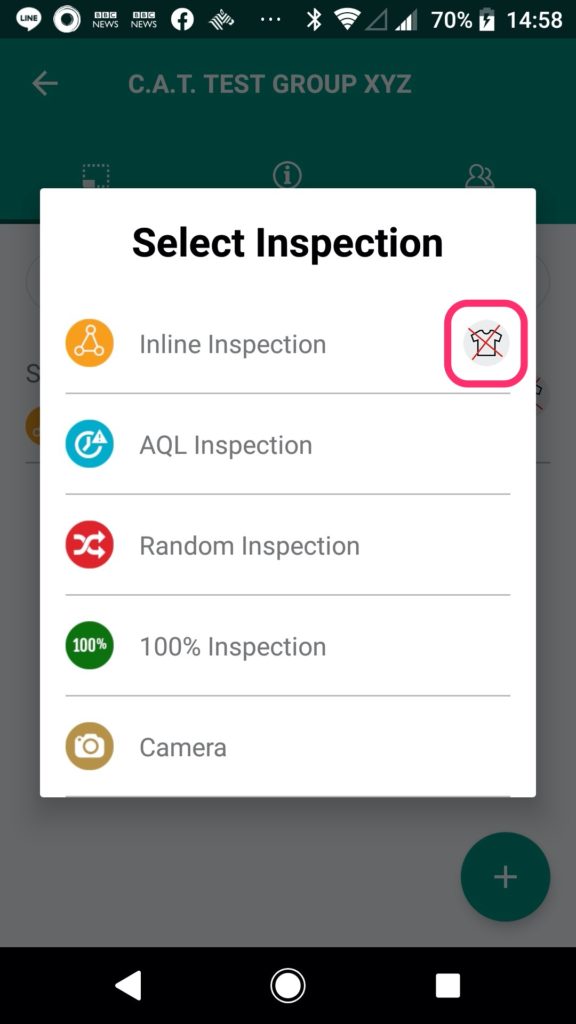
- By tapping the style number, the inspection type set for that style number can be selected. This time, select “Inline inspection”.
Select picture template selection (first time only)
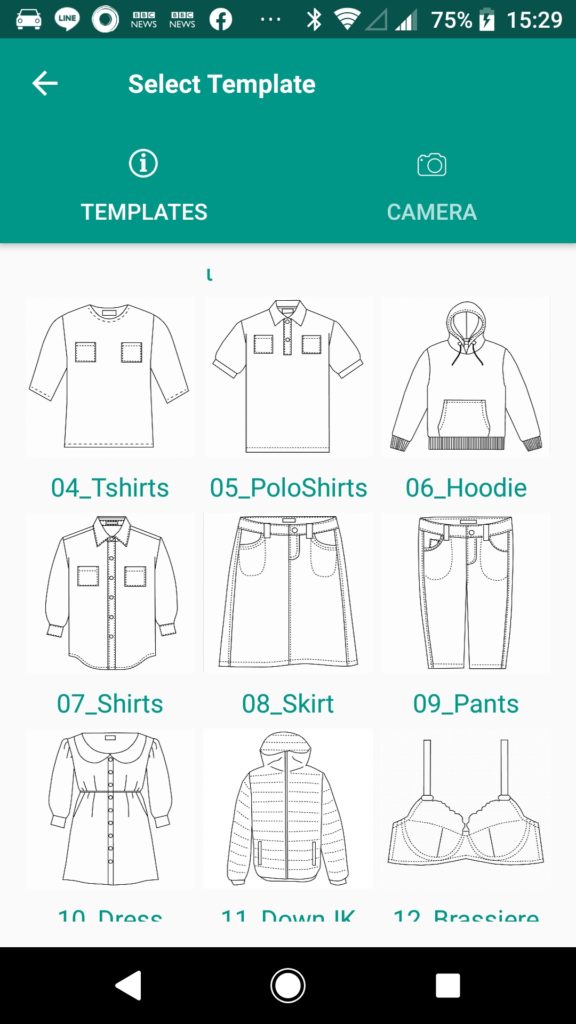
The style number with a red frame mark on the “select style number” capture image indicates that the pictorial image has not been registered. The pictorial image is the image data required when registering a defective point. It needs to select from the picture templates prepared by ITOHEN-IDAS or take a picture of the product and set it. But we recommend that you use pictorial templates unless there is a specific reason. When using the photos you take, please note that reading errors may occur in environments with poor signal conditions.
Inspection report setting
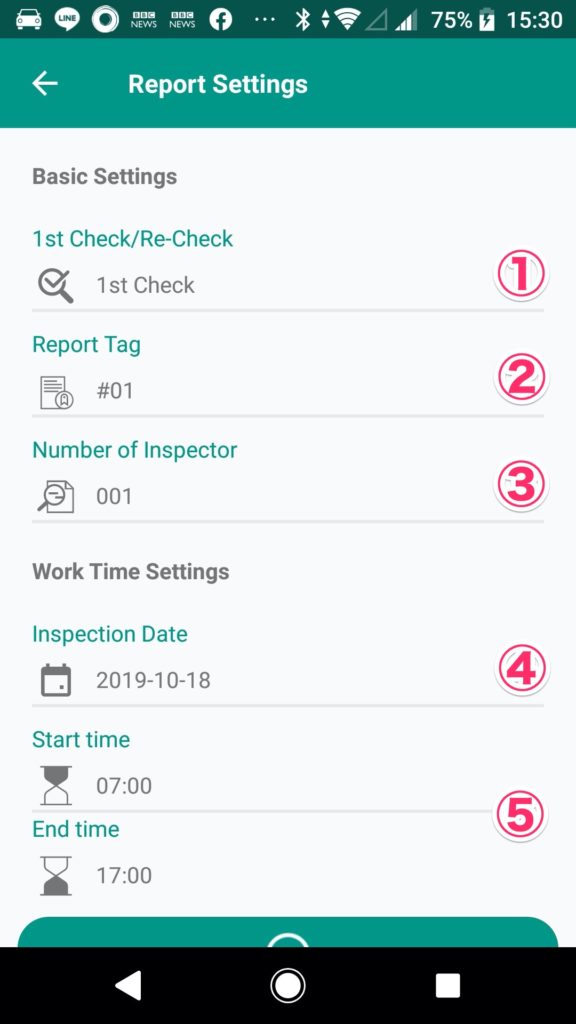
・① The First inspection or Re-inspection can be selected. It is also used as a condition for narrowing down inspection report aggregation.
・② By setting the report tag, it is possible to create an inspection report that is subdivided.
For example, by using the tag number 1 for the result of the daily previous inspection and the tag number 2 for the subsequent regular inspection, the daily preliminary inspection result can be individually extracted, or by separating the tag numbers in the morning and afternoon and aggregating data for half a day, can be used for feedback to factories. In addition, there are various possible ways to improve the workplace, such as assigning a tag number to each FQC individual for in-line inspection and conducting evaluation and guidance.
・③ The number of inspectors can be specified in the range of 001-999.
・④ Specify the inspection date. It is possible to specify within the range from the inspection start date specified when creating the style number to the day, it is not possible to specify before the inspection start date or future date.
・⑤ It is possible to specify the working start time and end time.
※There is no meaning to specify at this time of Ver 0.0.14
Inspection screen explanation
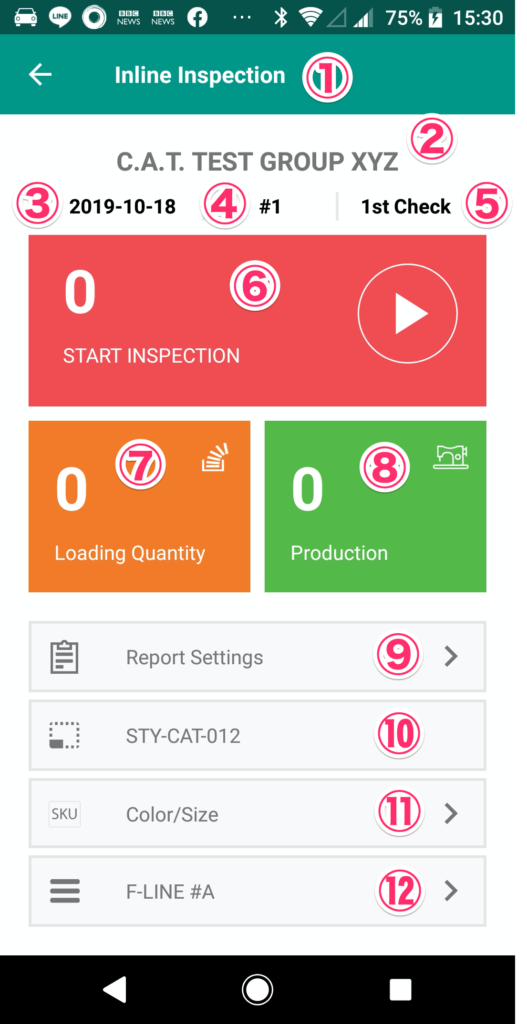
・① display the current inspection type.
・② display the group name in which the current style number is registered.
・③ display the inspection date specified in the inspection report settings.
・④ display the report tag number specified in the inspection report settings.
・⑤ display either the first inspection or re-inspection specified in the inspection report settings.
・⑥ is Inline inspection data registration button, and the current total defect quantity is displayed.
・⑦ is loading quantity registration button, and the current total loading quantity is displayed.
Loading quantity is the inspection quantity (A grade quantity + B grade quantity), and is an important value for obtaining the defect rate and defect point rate based on defect quantity and defect point quantity in inline inspection.
・⑧ is a production quantity registration button, and the current total production quantity is displayed.Although the productions quantity is an optional item, it is recommended that you enter them because entering them will allow you to see the progress of reducing the defects quantity and improving the productions quantity in a graph.
・Tap ⑨ to return to the “Inspection report settings” screen.
・⑩ display the current inspection style number.
・It is possible to select the SKU to inspect from ⑪.
・It is possible to select the Factory line from ⑫.
Input inspection data
In the Inline inspection, the defective point and defective items are registered in the order of Front Outside → Back Outside → Front Inside → Back Inside.
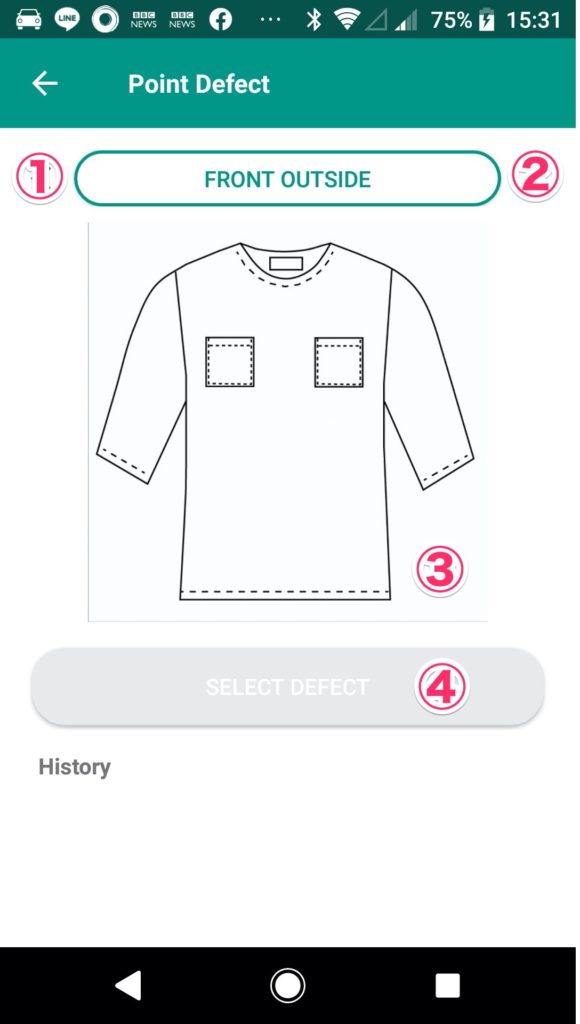
・① and ② are buttons for switching the surface. When the inspection of the FRONT OUTSIDE is completed, tap ② to switch to the BACK OUTSIDE.
・For ③, a pictorial image for registering a defective point is displayed. Tap the defective point and install ❌. (See video below)
・If ❌of a defective point is put ④, the button in ④ for selecting a defective item becomes effective. Check that there is no mistake in the location of ❌ and tap the button of ④.
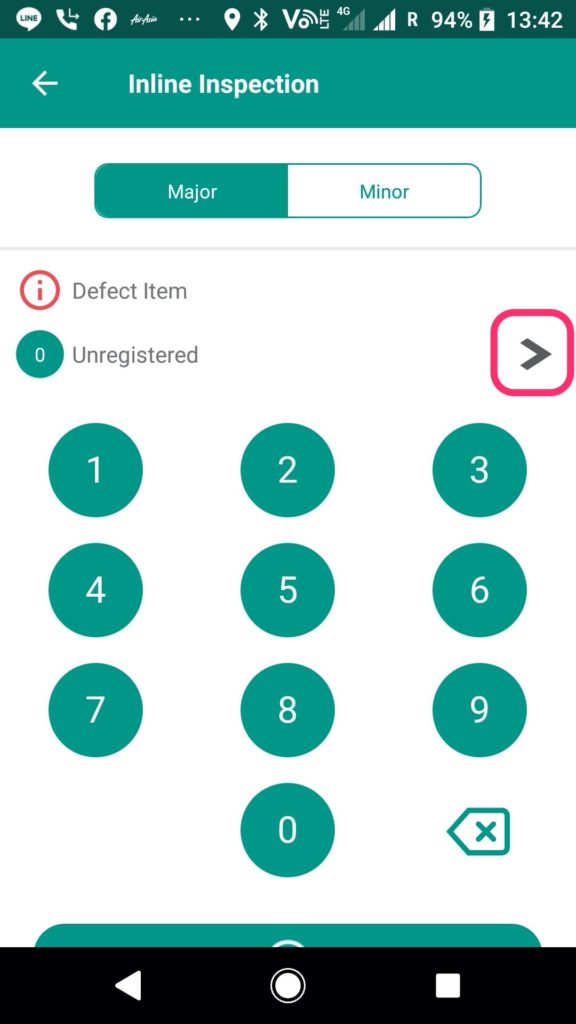
・Enter the defect item number directly, or tap the red frame to select the defect item, and tap the “Check” button at the bottom of the screen to accumulate defect information in the queue. Defect data is not sent to the server at this stage.
Defect image shooting
Up to 10 images can be saved for one report. Please note that if more than 10 images are registered, the inspection report will not be published and aggregation will not be possible. If you want to publish or aggregate, repeat deletion until the number of unnecessary images is less than 10 and then publish.
- By sliding the inline coordinate registration screen downward, the history of defective item information stored in the queue will be displayed.
- Find the defect item information you want to link and tap the photo icon on the right.
- Tap the photo mark to move to the shooting mode, so take a photo.
- Rotate and draw, and lastly tap the “Check” button to register the image in the queue.
Data transmission processing
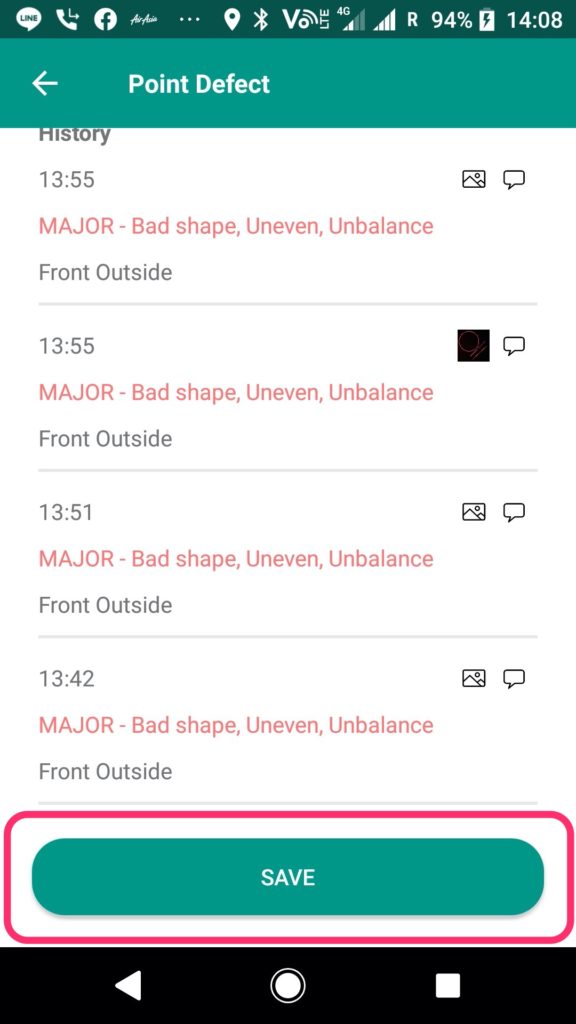
When all four sides have been inspected, be sure to tap the “SAVE” button at the end. Tapping the “SAVE” button here completes the inspection of one pcs and prepares to send the data to the server.