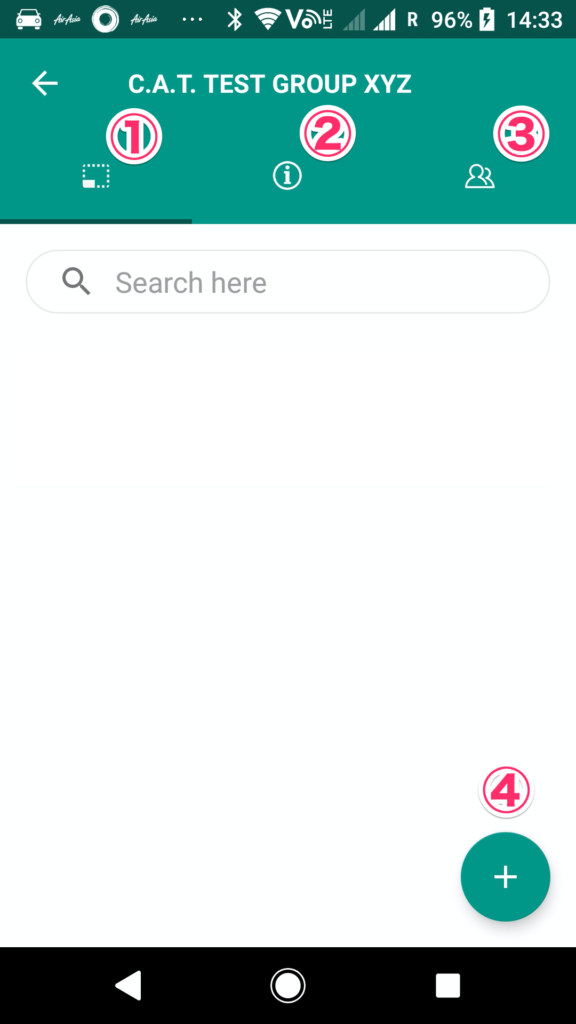
Explanation of group details screen
Open the group list and tap the corresponding group to transit to the “Group details screen”.
※It is possible to edit, duplicate, or delete by tapping and holding “Group” (Super User only)


・To switch between the three tabs on the screen, tap the icon or swipe the screen left or right to switch.
・① is a screen to display the style number list. Nothing is displayed on this image because the style number has not been registered yet.
・② is a screen to display the group information. The sewing line cannot be edited using the app, so edit it on the WEB screen.
General users can leave the group from this screen.
・③ is the edit screen of the members participating in the group.
・④ is a button to add a new style number to the group.
※Cannot be added if 30 style numbers are already registered in the group
Procedure for creating a new style number (APP)

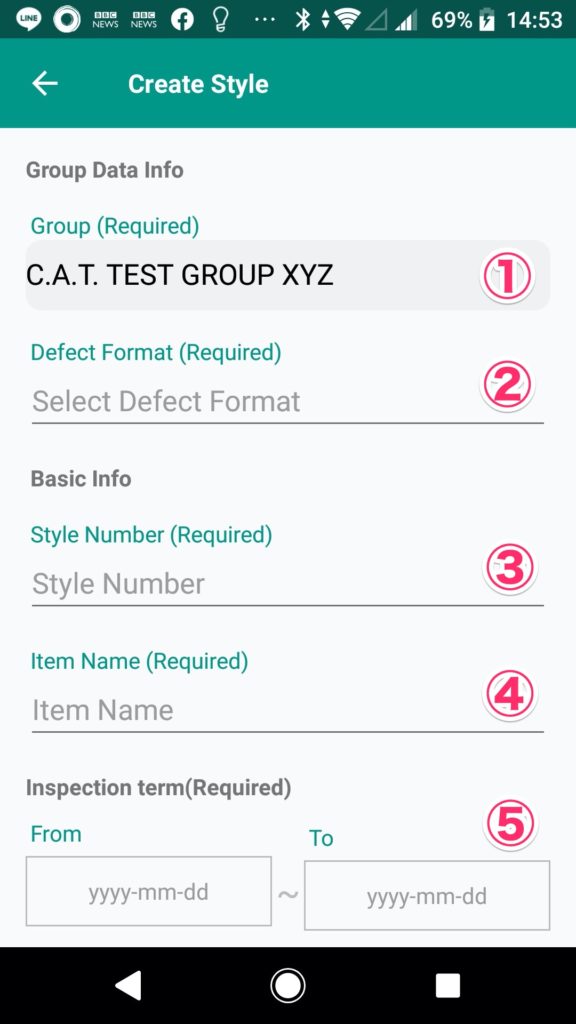
・① The group to register the style number cannot be changed.
・② Select the defective item format from the pre-registered IDAS basic format, or select from the original defective item format registered in the group.
※it is possible to edit original defective item format only from WEB screen
・③ is the style number that is also displayed on the list. About 50 half-width alphanumeric characters can be registered.
※Due to the limitation of the number of characters on the sheet for each style number of the inspection summary EXCEL, the style number will be omitted if it exceeds 18 characters(style number 18 characters-unique identifier 10 characters)
・④ is the item name, which is currently used for identification in the list, but is required.
・⑤is the inspection start date and end date. After the end date, it will not be displayed in the style number list on the app, but please note that the number of registrations in the group will be counted as one.

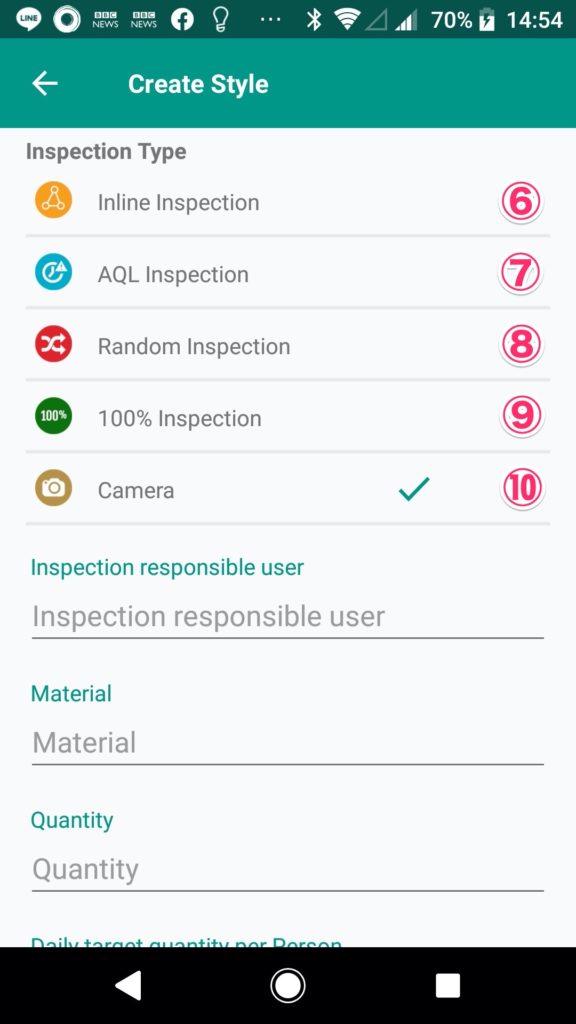
・To perform Inline inspection, tap ⑥ to put a check mark.
・To perform AQL, tap ⑦ to put a check mark. AQL can be selected from two methods: a method using a “sample inspection table” and a method for entering a defect rate and performing a simple comparison to see if it is below that value.(Under system construction)
・To perform Random inspection, tap to ⑧ put a check mark and select the sampling rate.The sampling rate can be changed when inspecting.
・To perform 100% inspection, tap ⑨ to put a check mark.
・⑩ is always valid. See here for camera functions.

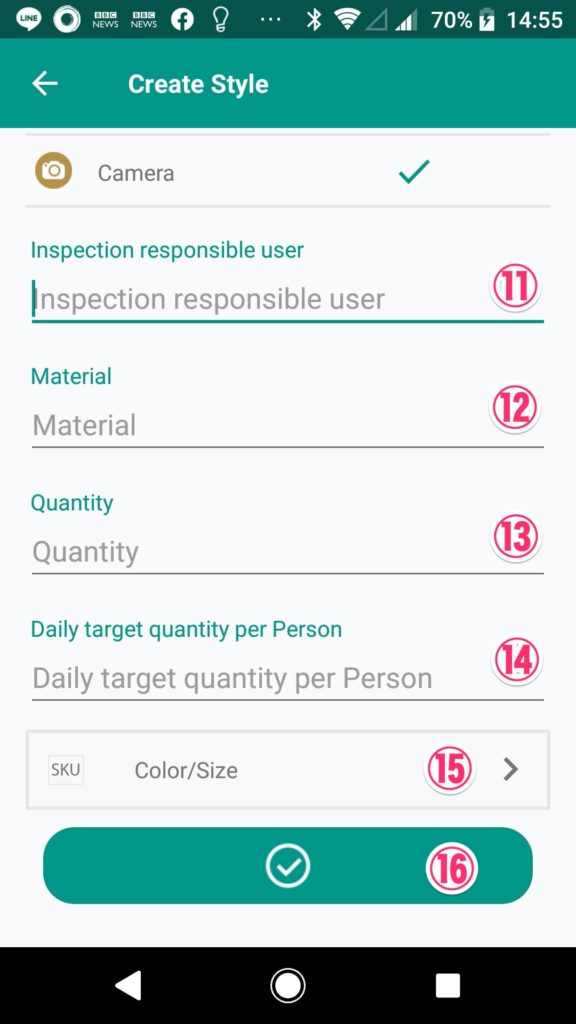
・⑪⑫ is optional.
・⑬⑭ is optional, but is used when displaying the progress rate by inputting the 100% inspection data or calculating the inspection plan (not implemented)
・Tap ⑮ to transit to SKU registration screen. SKU is a combination of color and size, and registration of at least 1 SKU is required.
※If you want to sort SKU, please do it from the WEB screen.
・After entering the required information, tap ⑯ to save the style number.
Procedure for creating a new style number (WEB)
(Additional creation after AQL specification change)